How to create a WooCommerce pick and mix product page

A pick and mix product lets customers build their own custom selection from a range of individual items – choosing the varieties they want and buying them together as a single order. It’s a popular format for sweetshops and candy stores, but the same approach works well for products like coffee blends, tea assortments, skincare samples, and gift hampers.
WooCommerce doesn’t support this kind of product out of the box. A standard simple product has no mechanism for customers to make multiple sub-selections, and a variable product only allows one variant to be chosen at a time. To offer a true pick and mix experience – where customers select several individual items, see them displayed visually, and have the total price update accordingly – you need a product add-ons plugin.
WooCommerce Product Add-Ons Ultimate lets you attach custom fields to any product, including a Products field that pulls your existing WooCommerce products in as selectable options. Combined with variation-specific fields, conditional logic and min/max selection controls, it’s the most flexible way to build a pick and mix product in WooCommerce.

How to build a pick and mix product in WooCommerce
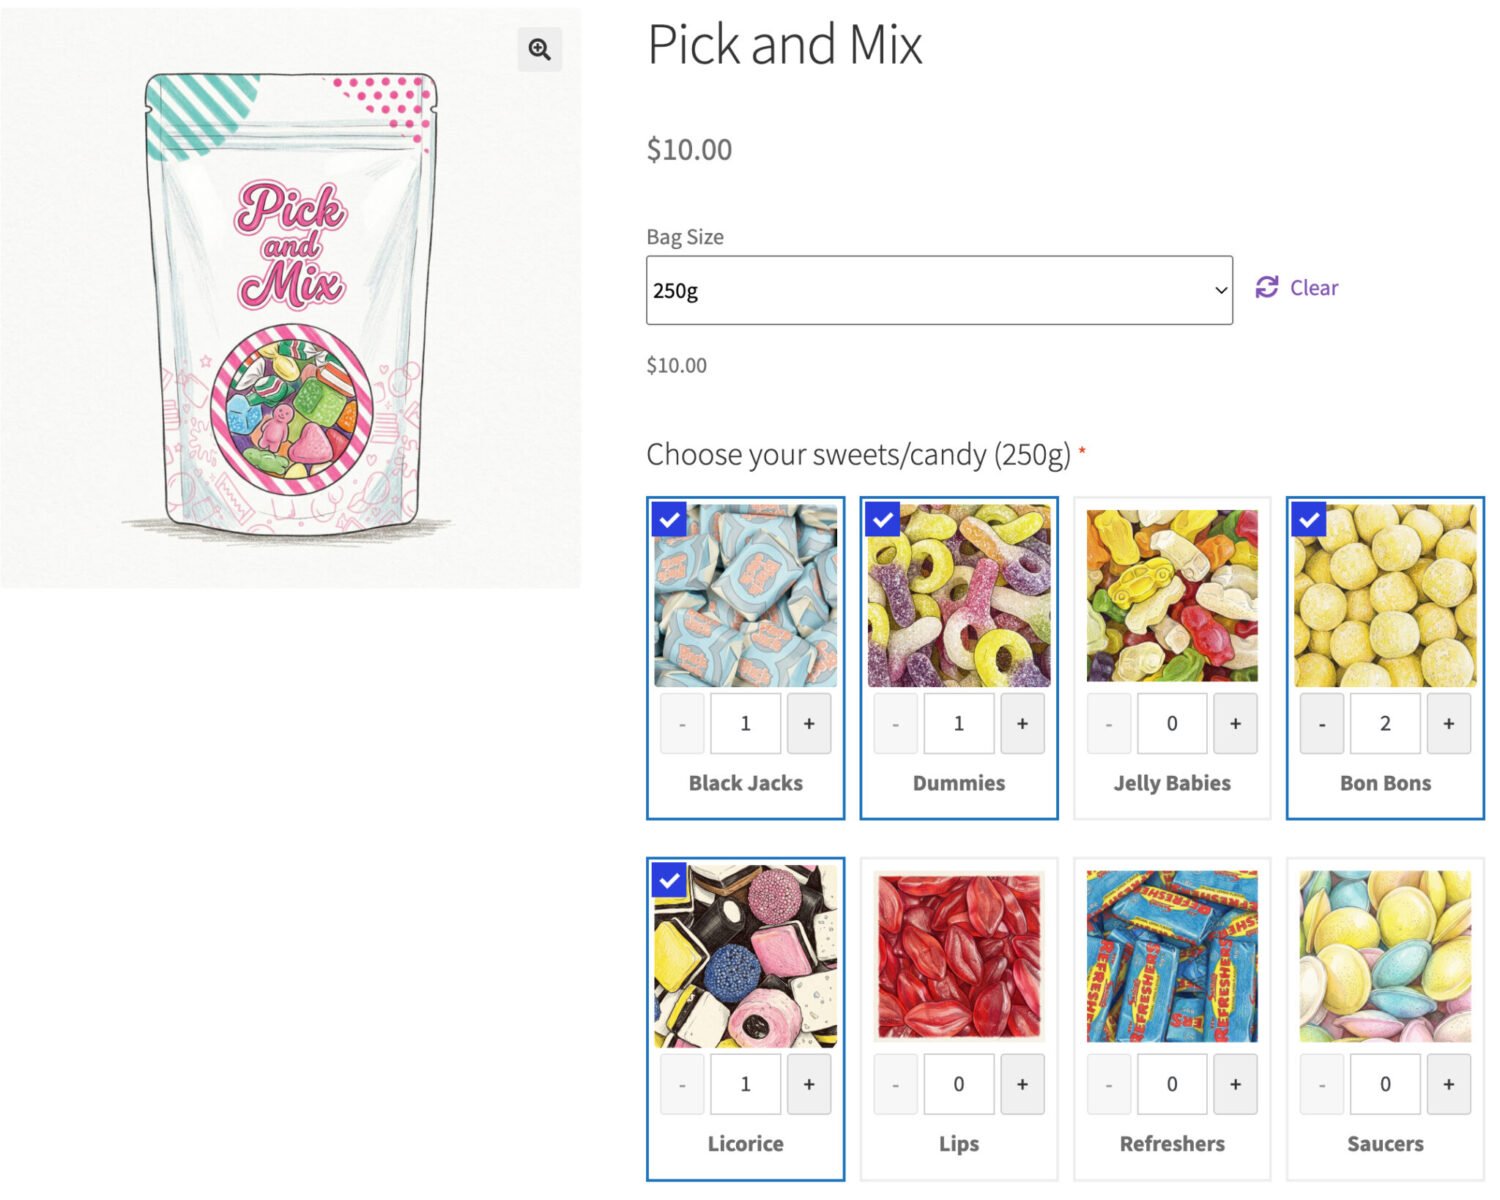
In this tutorial, we’ll build WooCommerce pick and mix product page where customers first choose their bag size as a product variation, then build their selection of sweets or candy from a grid of product options – with the number of choices available automatically adjusting based on the variation they picked.
We’ll use a variable product for bag sizes and two Products fields from WooCommerce Product Add-Ons Ultimate, each tied to a specific variation. Prerequisites: WooCommerce installed, Product Add-Ons Ultimate installed and activated.
There’s a fully functional demo product here.
WooCommerce pick and mix tutorial
Step #1: Set up your individual sweet and candy products
Before building the pick and mix product itself, each sweet or candy variety needs to exist as its own WooCommerce product. Create a simple product for each variety, giving it a name and product image. Set the price to 0 as pricing will be handled by the main pick and mix product. Set an inventory level if you need to track stock for individual varieties.
Assign every variety to a “Sweets” product category – this will save significant time when configuring the Products fields later. Set each product’s visibility to Hidden so customers can’t purchase them independently.
Step #2: Create the pick and mix parent product
Create a new variable product in WooCommerce. Set the product name (e.g. “Build your own pick and mix pouch”), description, and a featured image of the bag or pouch. Your description is a good place to mention both the sweets and candy varieties on offer to capture UK and US search traffic.
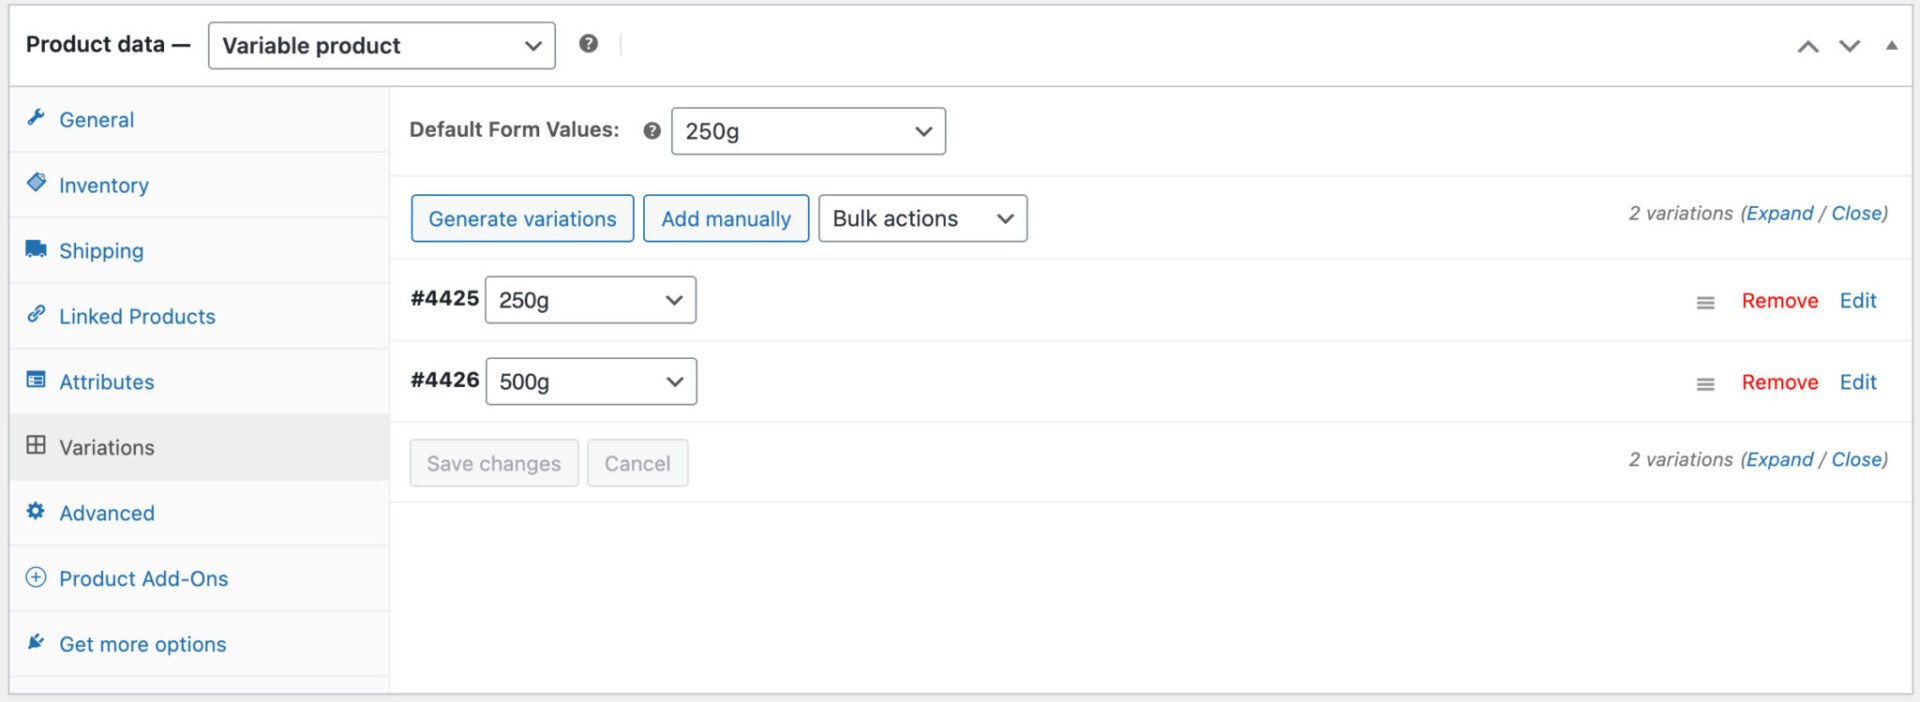
Go to Product data > Attributes and create a “Bag size” attribute with two values: “250g” and “500g.” Then go to Variations and generate variations from those attributes, setting the price for each – for example $10 for 250g and $15 for 500g. Publish the product.
Step #3: Add and configure the 250g Products field
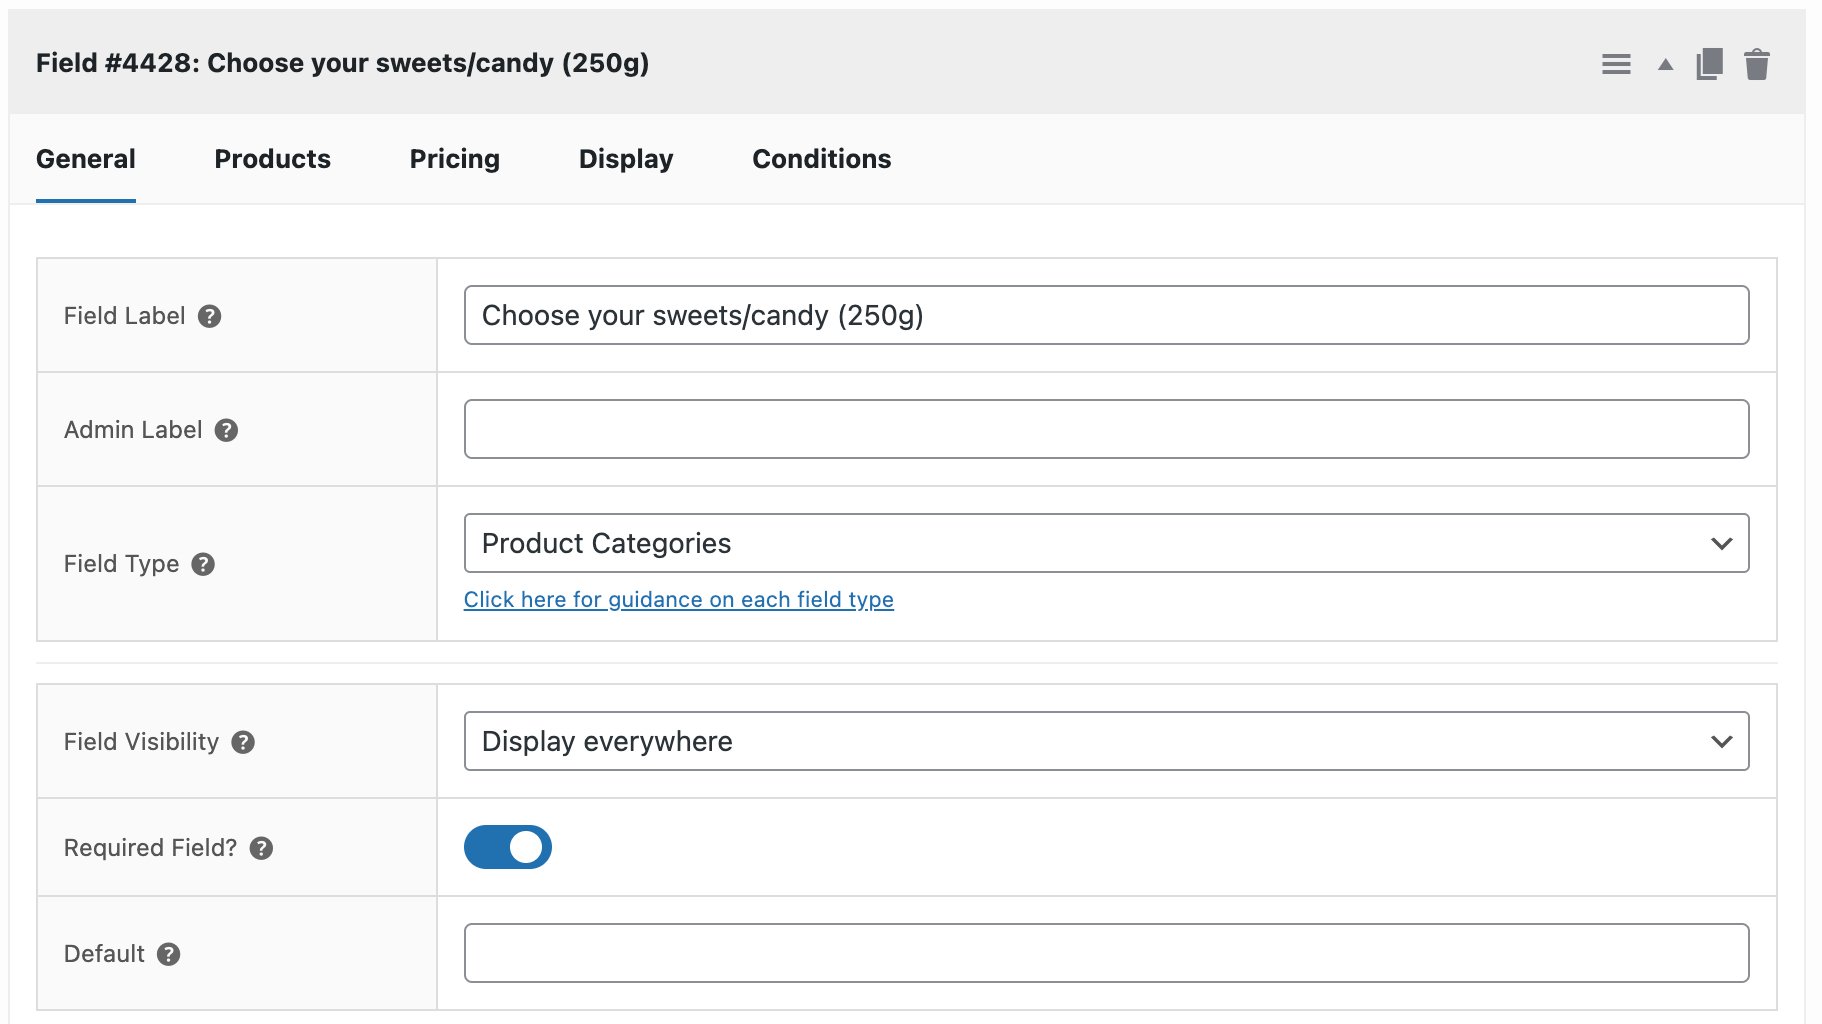
In the Product Add-Ons panel on the product edit screen, add a new group and within it add a new field. Open the Field Type dropdown and select Product Categories. Label the field “Choose your sweets / candy.” Check Required field to enforce validation on Add to Cart.
Go to the Products tab and select “Sweets” in the Product Categories setting – this pulls in every product from that category automatically, so you won’t need to add varieties one by one. Set Product layout to Checkboxes Images so each sweet or candy displays with its thumbnail and customers can select multiple options. Set Product quantities to Independent. Set Max Child Products to 5 to enforce the 250g limit.
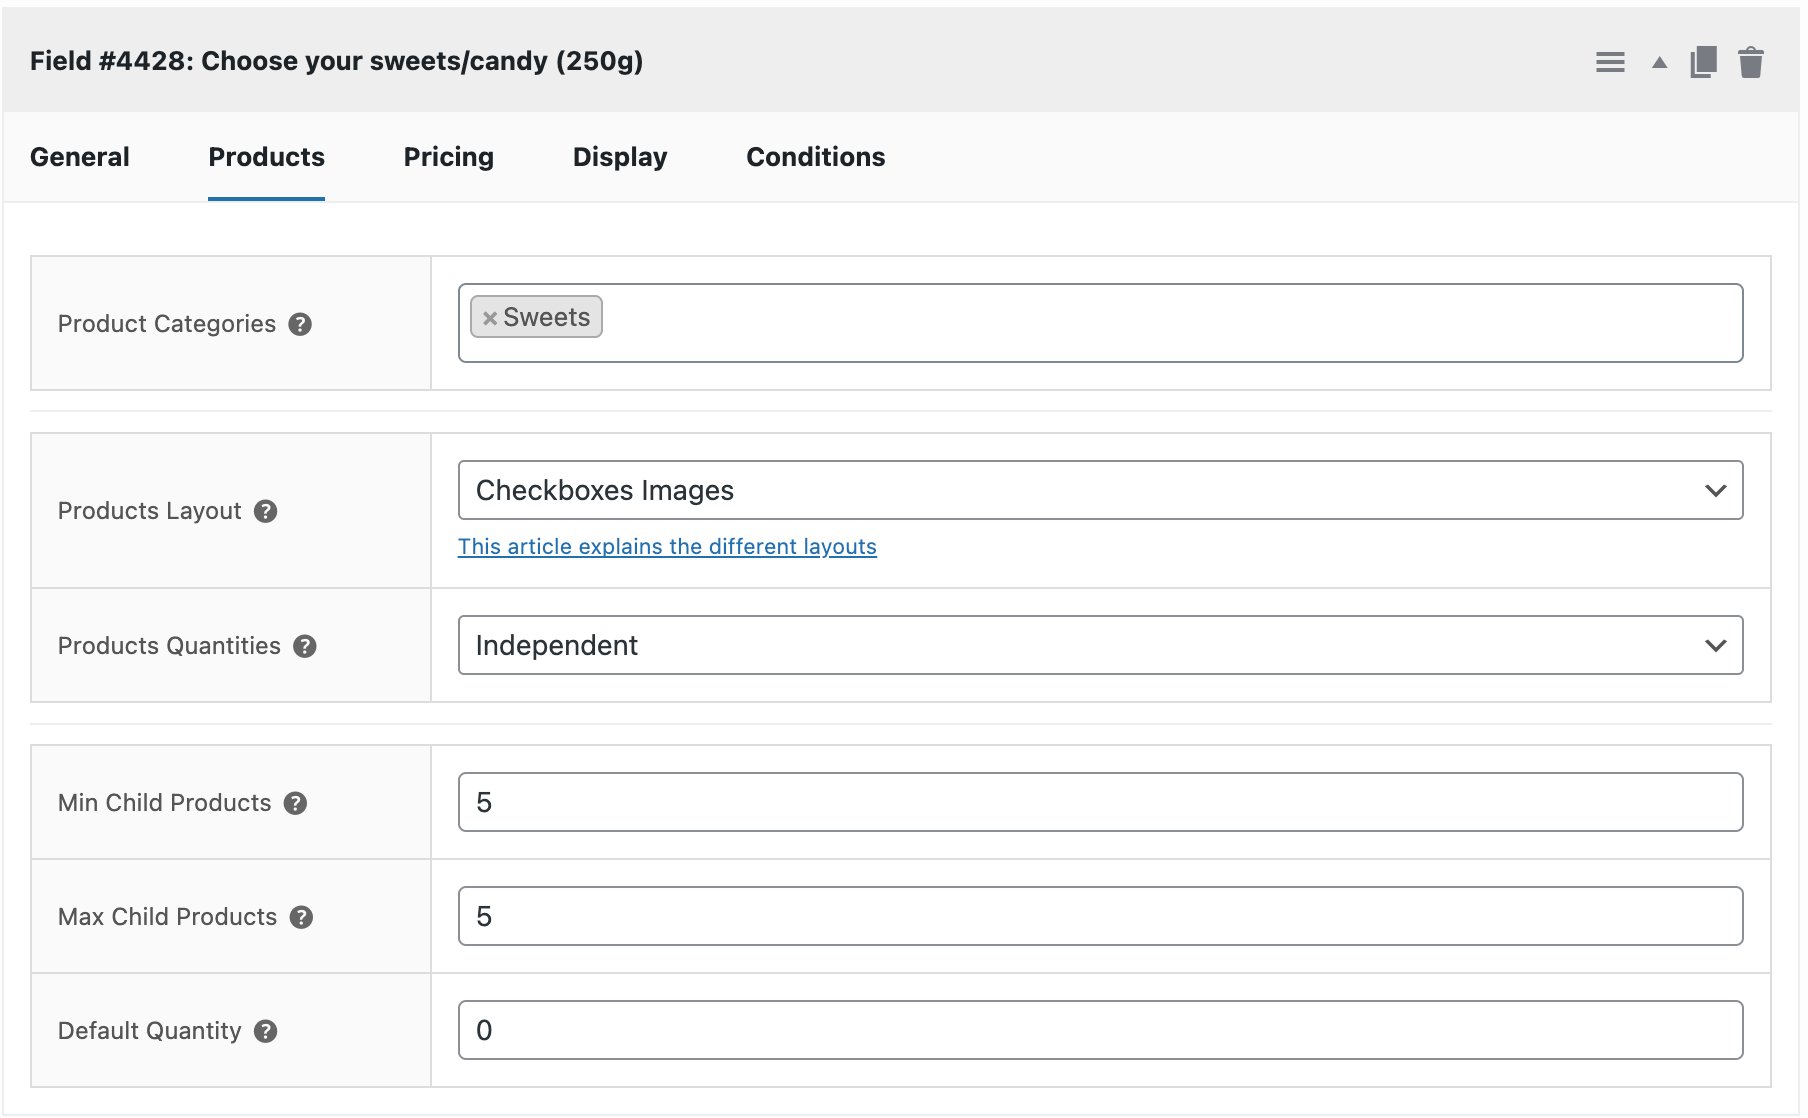
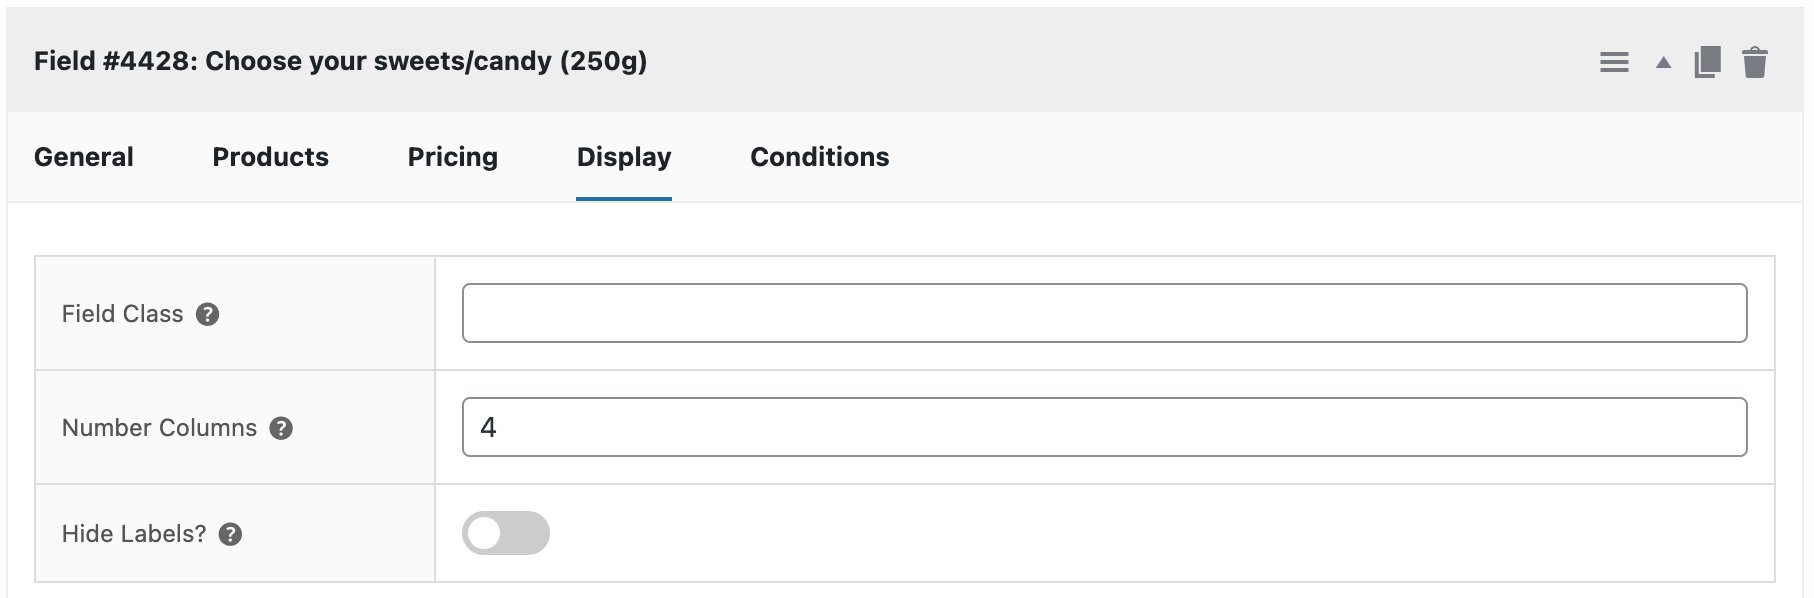
On the Display tab, set Number Columns to 4 to create a classic pick and mix grid layout.
Step #4: Duplicate the field for 500g and update the limit
Duplicate the group or field you created in Step #3. Update the Max Child Products setting to 10 to reflect the larger bag size. Everything else – the category, layout, column count, and required setting – can stay the same.
Step #5: Tie each field to its variation
With your product saved, open the Conditions tab on the 250g Products field. In the Variations section, select the 250g variation. Repeat this for the 500g Products field, selecting the 500g variation.

Now when a customer selects a bag size variation, only the Products field with the matching limit will appear – no need to set up manual conditions based on a select field.
Step #6: Optionally enable QuickView
If you’d like customers to find out more about a particular sweet or candy before selecting it, go to WooCommerce > Settings > Product Add-Ons > Products and enable QuickView for child products. This displays the product thumbnail, title, and short description in a lightbox when the customer clicks the product name – a useful touch for stores with a large or unfamiliar sweets or candy range.
Step #7: Test the page
View the product on the front end. With no variation selected, confirm that neither Products field is visible. Select the 250g variation and confirm that only the 5-item grid appears. Switch to 500g and confirm it is replaced by the 10-item grid.
Try selecting more than the permitted number of sweets or candy options and verify that the validation triggers on Add to Cart. Finally, confirm that the chosen variation and all selected products appear correctly in the cart and order summary.
What other pick and mix features can you add?
Optional enhancements: apply a discount to child products on the Pricing tab to reward customers who choose a larger bag size; use the Redirect hidden products option (WooCommerce > Settings > Product Add-Ons > Products) to prevent customers from accessing individual sweet or candy products directly; and as you add new varieties to the “Sweets” category, they’ll appear in the Products field automatically – no need to update the field configuration.
Could you use Swatches instead of a Products field?
The Products field is the best choice when each sweet or candy variety already exists – or should exist – as its own WooCommerce product, since it keeps stock levels, pricing, and product data in one place. If your sweets or candy options don’t need to be managed as individual products, image Swatches are a simpler alternative. You add each option manually with a label, image, and optional price uplift, without needing to create separate product records. The variation-specific field approach described in this tutorial works in exactly the same way with Swatches fields.
WooCommerce pick and mix product recap
That’s how to easily create a pick and mix product page for your online sweetshop or candy store. You just need the WooCommerce Product Add-Ons Ultimate plugin.
The pluin works with all themes and page builders, and we provide world-class support if you need any help setting up your pick and mix store. Plus, we offer a 14-day money-back guarantee on all plugins – so you can test it out risk-free.